Preparing Rye Grain For Mushroom Cultivation
When it comes to rye grain preparation – or indeed preparation of any grain – mushroom growers generally start off in one place and slowly develop a process that suits their environment, skills and patience. What we will cover here is the ‘standard’ way of preparing rye grain. Rye grain is a great choice for use as grain spawn – by that we mean it serves as a good home or growth medium for your mycelium to grow in, which is the first stage of mushroom cultivation. Other grain types are also suitable, but we consider rye to be among the best.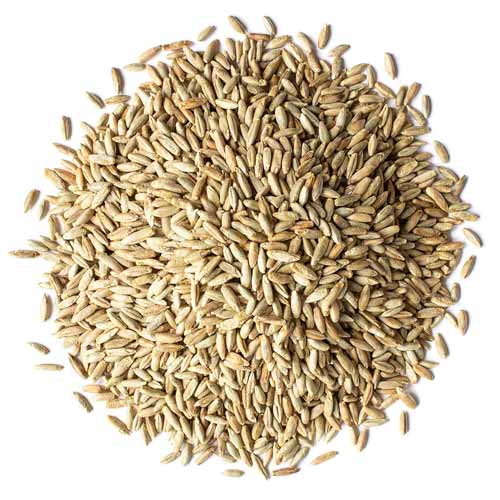
Rye Grain Preparation
Correct preparation of rye grain involves removing any debris such as bugs, dust and so on that may come with your rye, then hydrating and sterilising it ready for use as grain spawn. It’s important to ensure your rye grain is correctly hydrated; not too dry and definitely not too wet. Too little water means mycelium can’t grow and too much water will leads to the same thing, plus higher risks of contamination.
If your rye grain contains too much water, the grain kernels can explode, exposing the nutrients inside them and making them much more susceptible to contamination. Exploded grains also lead to clumping and areas of reduced air exchange within your grain/substrate. They don’t work as well, in simple terms.
What do I need to do?
In simple terms, you need to rinse the grain to remove impurities, soak it for between 12-24 hours, drain it, add it to fresh boiling water, allow it to gently simmer for 15-20 minutes, remove from pot and drain it again, allowing the grain to steam dry until it is dry on the outside, but still hydrated (full of water) inside. You then put your hydrated grains into jars or bags and sterilise it in a pressure cooker at 15psi. That’s it, in a compressed nutshell!
You’ll need:
* Your grain
* A large plastic bucket with a lid
* A brewer’s bag or clean pillowcase
* A large draining rack – something with holes a little smaller than the grains themselves
* Water – hot
* Gypsum (optional but advisable)
* A timer of some sort
* A large mixing spoon
* Something heavy to hold your grain sack down under water.
* Gloves to protect your hands while handling a sack full of steaming hot grain
* Mason jars / Mushroom bags to sterilise and store your grain in
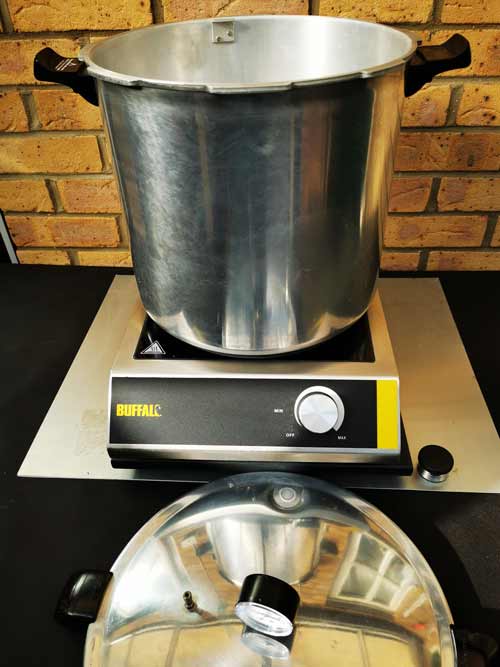
* A large boiling pot (a 20-25 litre stock/soup pot is best)
* A large pressure cooker – Presto 23qt is recommended – able to cook at 15psi
Grain Preparation – Full process
1) Weigh out the amount of rye grain you want to use, bearing in mind it will approximately double in size once the process is complete. For the same of simplicity, we’ll say you weigh 1000g (1Kg) of dry rye grain. You should either use scales that allow you to zero out the weight of the container, or write the container weight down before weighing. Keep the container ready for later use.
2) Put your grain into your bucket and pour in hot water, enough to cover the grain.
3) Stir the grain repeatedly, pouring away any floating debris – the aim being to loosen and remove unwanted rubbish and dust
4) Replace the water as many times as it takes so that you end up with clean water and no debris floating in it.
5) Drain and then scoop your rye grain into your brewer’s bag or a clean pillowcase, tie the top off, then put it into the bucket
6) Add 5 grams of gypsum (assuming 1Kg of rye grain) into a large pot of water to dissolve it, then pour it into the bucket. You need enough water to fully submerge your grain bag.
7) Put a heavy weight on top of the now submerged bag of rye grain to keep everything under water, close the lid and leave it to soak for at least 12 hours. Covering the bucket with towels etc to keep the heat in as long as possible is an option. This soaking stage allows any endospores to germinate, which allows them to be killed during sterilisation.
 8) Once the soak is complete, remove the grain sack from the bucket and transfer it into a large soup/stock pot. Fill this pan with fresh water, covering the grains fully. Don’t use the weight this time. Bring to a full boil, then put a lid on the pot and turn off the heat. Leave for 15 mins, 20 mins max. Any longer than that and more grains will burst.
9) Remove the grain sack from the pan and allow the grains to steam drain, ideally on a flat draining surface, like a mesh grid. What you are aiming for is to allow the grains to dry on the outside, while retaining water inside. If you followed the initial instruction to weigh your rye grain, remember that it weighed 1000 grams when dry. The longer your grain dries, the more water will evaporate, making the grain lighter. When it is touch-dry, lay a square of toilet paper on top and see if it absorbs water. If it visibly marks up, it’s probably still a bit too wet. When you think it’s about right, transfer it to your weighing container and weigh it again. You’ll already realise that the grains are now bigger and heavier than when dry. If the grain is correctly hydrated, you’re looking for it to weigh around 1920 grams – this will give you an approximate water/hydration level of approximately 54%. Finding the exact percentage depends on the exact moisture content of your dry grain requires a little more work and isn’t necessary, and the above guide works very well.
10) Once you’re happy that the rye grain is correctly dried/hydrated transfer it into the jars/bags you plan too use it in – for example mason jars with adapted lids or mushroom bags. Load these as normal into your pressure cooker, seal the PC and heat it until pressure reaches 15psi. Once it reaches 15psi, set your timer and cook the rye grains for an appropriate time – this can vary according to how full your container is and how big your bags/jars are but as a guideline you can say 2 hours is good in most cases. Larger bags will need longer for the steam heat to fully penetrate, so would need up to 3 hours, whereas a lighter load of small bags/jars might only need 1.5 hours.
Finally, once you switch off the pressure cooker, allow it to fully cool down naturally. Don’t try speeding it up by removing the pressure weight; be patient. When all is at room temperature, open the pressure cooker, remove your rye grain. Fully tighten your jar lids before removing jars. If you used bags, remove them carefully (ideally in front of a laminar flow hood) so as not to disturb them, then immediately seal them with an impulse sealer.
You’re done.