Making Agar Petri Dishes
Preparing Agar and making Agar plates / Agar dishes
If you’re serious about growing your own mushrooms and managing the whole process from start to finish, you will be working with spore prints and/or spore syringes. From there, you’re best advised to transfer your spores into agar plates / agar petri dishes where they can develop into live healthy mushroom mycelium. You can buy pre-poured agar plates or you could just make your own, and that is what this article is about. It’s a little long, but it’s worth reading if you want to get it right.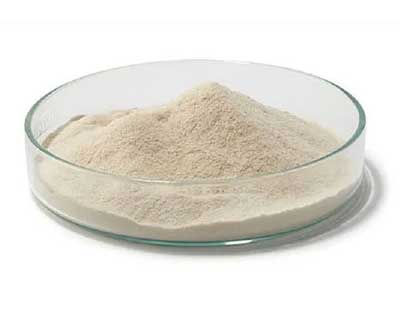
What is Agar?
Agar (aka Agar-Agar) is a gelatinous substance primarily derived from seaweed. Ity’s an odorless, tasteless, and transparent substance, a bit like jelly, but without flavour. It’s also one of the very small number of things that can be used both in your kitchen – as a vegetarian jelly – and also in a high-tech pharmaceutical laboratory, where it is used as a nutrient gel on which the growth of bacteria can be studied and measured.
Who cares about all that? Mushroom growers, is who. It’s what we use to produce live mushroom mycelium!
How is it used in mycelium production?
If you want a good crop of healthy mushrooms, you’ll want to inoculate your chosen spawn material with nice pure live mycelium, free of contaminants and competing spores or fungus. You can do that by introducing mushroom spores to a nice clean dish of agar, which serves as both food and a place to grow. Once incubated (kept at a stable temp between 20-25c) you can watch your mycelium develop, along with any unwanted organisms (if any) growing along with the mycelium. If unwelcome travellers show up, you simply cut out a piece of healthy mycelium, transfer that to another dish of agar and let that carry on growing – and throw away the contaminated dish/contents. You may need to transfer healthy mycelium several times in this way before you end up with what you want; live, healthy mushroom mycelium ready to take to the next stage.
 Mixing and using Agar
Before you start, you need to think about how and where you’re going to work with your agar and spores. Ideally, you’ll have a laminar flow hood. Some people swear by the lower-cost ‘still air box’ or ‘glove box’ and even cheaper (andless reliable) techniques such as ‘oven tek’ which basically involves working in front of an open oven door with the oven fan blowing warm air out, theoretically blowing away contaminated air. Best advice is to get a laminar flow hood but it’s your choice.
You’ll also want to make sure you have the right equipment; suitable containers for mixing and sterilising your agar mixture, decent quality digital scales for weighing ingredients, suitable petri dishes, paratape to seal them and a pressure cooker to sterilise the agar.
To keep surfaces clean, you also want disposable nitrile gloves (ideally long-sleeved) and a ready supply of 70% alcohol for cleaning equipment, hands and surfaces. You’ll also want to stock up on disposable medical grade face masks to reduce contamination risks from your own breath. Covering the skin and hairs on your arms will stop you dropping skin cells and hairs onto your dishes. If nothing else, wrapping clingfilm round your lower arms is a reasonable alternative.
Moving on..
Preparing agar is a simple science, but one that requires careful attention to detail, precision and the highest possible level of cleanliness. 70% alcohol, like a flow hood, is your best friend here and eyeballing quantities has no place in your routine. There are many different agar recipes that you can use, but for this article we’ll cover the most popular recipe.
What you need:
Reagent bottles
Accurate digital scales (measuring down to at least 0.1 grams)
10 grams of agar-agar
10 grams of light malt extract
500ml of boiling water
20 standard petri dishes plus Parafilm to seal them
A glass jar for mixing and stirring – wide-mouthed is better (see malt extract below)
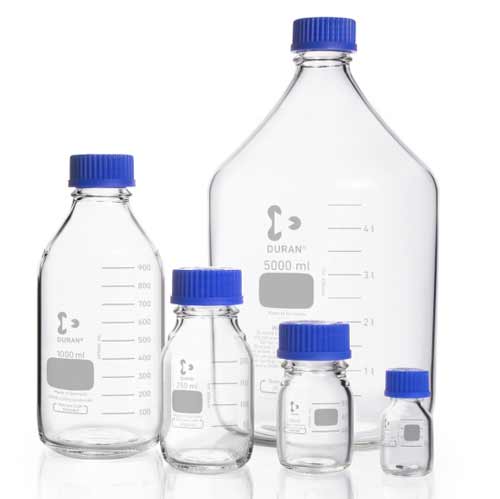
The containers you will use to sterilise the agar, such as ported mason jars or screw-top “reagent bottles”
A suitable autoclave or pressure cooker
Nitrile gloves and 70% alcohol for cleaning
What type of petri dish?
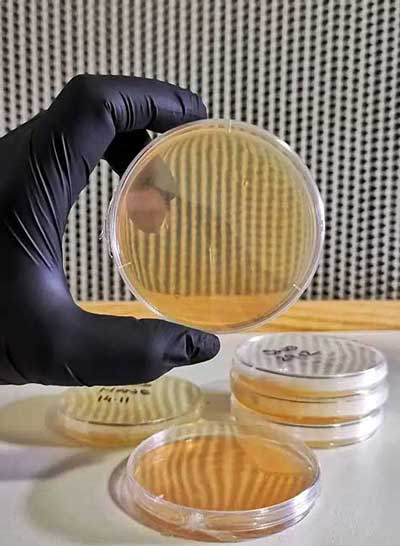
The standard petri dish size used for mycology is 90mm or 100mm in diameter, and 15mm deep. They can be made of glass or several types of plastic – disposable ones will be cheaper plastic and will melt if you put them in a pressure cooker. Glass and some types of plastic can be reused as they are autoclavable. Be sure to know which you buy! You will also see listings for ‘vented‘ as well as ‘unvented‘ petri dishes. Vented dishes are ideal for mycology as they allow a sufficient level of air exchange – the shape of the dishes plus sealing tape means contaminants won’t get into your agar if correctly used and sealed. When you buy petri dishes don’t expect the lids to be tight fitting – they’re not. It’s normal.
Preparing your agar mix
Using an accurate set of scales, measure 10 grams of agar into a clean, dry dish.
Repeat the process and measure 10 grams of light malt extract.
Finally, measure 500ml of boiling water
Put all 3 ingredients into your sterile mixing jar and stir vigorously until the dry ingredients are 100% fully dissolved. If you have a magnetic stirrer (typically about £20-30) simply drop a magnetic flea (like a little metal capsule) into the jar and set it spinning until the job is done.
Light malt extract is very moisture sensitive. What this means is that it will very quickly start to stick to anything it touches – spoons, scales, funnels, paper and anything else it touches. Even the moisture in the air seems to affect it. There’s nothing much you can do about it, so just be aware. For that reason, it’s better to use a wide-mouthed container at the mixing stage as you’ll need to tap/scrape the powder off whatever you weighed it on. If you use narrow opening containers it will inevitably stick to the opening neck.
Once the mix is fully dissolved, carefully pour it into your final containers – most people seem to use mason jars for this as they’re autoclavable, but we use autoclavable medical “reagent bottles”. Very handy things to have. Whatever you use, fill the jars to a maximum of 70% full to leave room for bubbles as the mix cooks in your pc. Do NOT fully tighten the lid of anything you put into a pressure cooker as it may burst. 75% closed is fine. As a final precaution, wrap the top half or at least the neck of your jars with metal kitchen foil – it keeps water off any filters your containers have and also keeps contaminants away from the jar surfaces right up to the moment you remove the foil to start pouring. If using open-neck jars during pressure cooking, add some polyfil fibre as a filter to properly block the hole, as contaminated air may otherwise be drawn in between when you open the pressure cooker and when you’re ready to pour the mix.
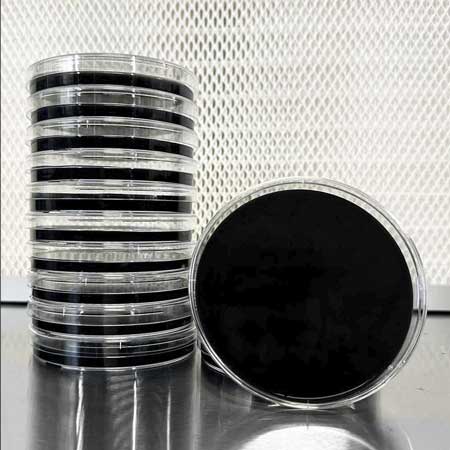 Tip: Some growers like to add colour (food colouring) to their agar on the grounds that it makes it easier to see mycelium growth, or just because it looks more interesting. It’s worth bearing in mind that some colours may make it harder to identify contaminant growth. Our advice would be to either use natural agar (it ends up an amber-ish colour) or use black agar to give the best visible contrast and a more interesting appearance. To make black agar, you would add 2 grams of “activated charcoal powder” to the 500ml recipe above. Beware of charcoal powder as it’s incredibly fine and gets absolutely everywhere!
Sterilising the agar mix
Obviously, first check your pressure cooker is in good order, clean and with good seals. Put your pressure cooker onto whatever hob you use to heat it – you don’t really want to move it once it’s loaded – then load it with your containers, upright and not touching each other or the sides of the pressure cooker. Pour the recommended amount of water into your pressure cooker (according to your specific cooker needs) – in any case, water should never reach more than 30-50% up the sides of the shortest jars.
Once fully loaded, seal the pressure cooker and turn on the heat source, allowing it to build pressure until it reaches 15psi (approx 120°C). Once you reach 15psi, start a 30 minute timer. Once the agar has cooked for 30 minutes, turn off the heat and allow the pc to cool and lose pressure. DON’T try to speed this process up. If you try to speed things up, (for example removing the pressure cooker weight to vent pressure quicker) your agar will instantly boil over and you’ll find half of it inside your pressure cooker! Seriously, don’t do it. Once the pc has lost pressure and the contents have begun to cool, you need to prepare to use it before it cools too much.
Don’t let your Agar cool too much!
If agar cools down to 42°C it begins to turn into a solid form (think of partly-set jelly) which will make it lumpy or even impossible to pour. Ideally, you need it to cool to around 50°C, which is warm enough for it to still be liquid but cool enough to be handled safely. Pouring it while too hot can cause excessive condensation in your much cooler petri dishes, so be patient. A good thing to have is a Digital Infrared Thermometer – they don’t measure the agar temperature but instead the temperature of the container, but glass conducts heat well so it’s a good guide. If you don’t have a way of measuring the temperature, it should be warm and in a visibly liquid state (it will get thicker as it cools) but not too hot to hold in your hand. Be aware that once you start pouring, the agar in your pouring jar will begin cool down much more quickly, so be quick, but careful.
To allow agar to cool to your target temperature but prevent it cooling below that, the agar container can be placed in a warm water bath set to maintain 50c – this means that the agar will cool to 50c and then be kept at the right temperature by the water bath (no more forgetting to check until your jar is full of solid agar).
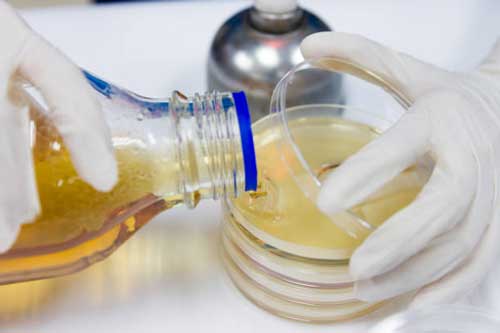 Time to do some pouring
Once your liquid has cooled sufficiently, give it a final few gentle swirls around to check it’s consistently mixed and then open your first petri dish and quickly pour in a little of the mix. The usual advice is that you only need to pour enough to cover the bottom of the dish – we fill to about 1/2 full. Pour all your petri dishes one at a time, keeping the lids open for the shortest possible time. Leave them all stacked in your sterile area until they are all filled and allow them to cool. If you leave your laminar flow hood running, leaving them for a coupl eof hours is fine. Then, cut a little length of parafilm, fold it half lengthwise (most parafilm on sale is 50mm wide) and stretch-wrap it around the edge of each petri dish to seal them.
Condensation Problems
To reduce condensation as much as possible (loose water swilling around inside your petri dish is not good) you need to reduce the temperature differential between your liquid agar and the petri dishes. No one thing works on its own, but there are a couple of things you can do to help. As a starter, pouring agar at the correct 50c temperature helps. Gently warming your petri dishes (beware of warping plastic ones) is a good idea if possible. We use a small incubation unit to warm them up (still inside their sterile packaging) beforehand. Then, after you pour the agar, putting your petri dishes into stacks 10-20 high helps, as heat from the dishes above and below is shared evenly, reducing the risk of ‘temperature shock’.
Finally, with your petri dishes in a stack – as tall as you think is safe and stable – place a container of boiling water on top of the stack. A mason jar works well for this. If you use plastic petri dishes, but have a spare glass one, place the glass dish between your top plastic dish and the jar of boiling water (some plastic dishes can’t handle direct contact with high temperature). The heat from the water will percolate down the stack and help reduce the condensation. You won’t get it all, but you can get most of it this way and anyway, Agar is cheap to make, so throwing some away is no big deal.
Finally, cooling and storage
To prevent undue condensation in the dishes, allow them to fully cool and solidify down to room temperature – check them after a few hours to see if the initial condensation has gone. Once the agar is fully set and all condensation has gone, store them upside down in a fridge or cold room. If you don’t plan to use your agar dishes within a couple of days, put them in small stacks and wrap them in clingfilm and then put them inside an airtight sealed bag. Agar will naturally start to dry out if not used, and this helps slow down that process. The thinner the layer of agar, the quicker they will dry out.
How to use agar dishes
The next stage is to introduce spores (or live mycelium) to your freshly poured agar dishes and, as this article is longer than most readers’ attention spans can bear, that process is covered in another article!