How to make a spore syringe
Depending on how you want to go about growing mushrooms you might decide to buy a spore syringe, or maybe start making your own. Buying a spore syringe isn’t a bad idea – if nothing else it saves you a bit of work – but making your own isn’t really that hard and only needs the same sort of equipment you’d need for making liquid cultures or sterilising your own substrates.
What is a spore syringe?
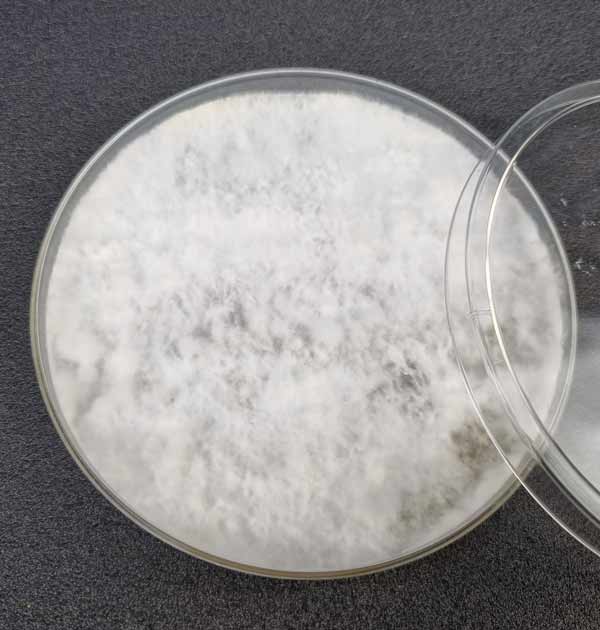
Mycelium grown from spore prints
Spore syringes are what the name suggests, with mushroom spores suspended in sterile water in a syringe. The spores will have been scraped from a spore print in sterile conditions, ideally in front of a laminar flow hood, mixed with sterilised water and sucked into a syringe. This mix can then be used to incoluate agar in petri dishes, inoculate liquid culture or, if you’re impatient, inoculate your spawn/substrate.
Does everybody use spore syringes?
While they play a part in the process of growing mushrooms, many growers avoid using them. The reason for this is the risk of contamination. It’s more or less impossible to be sure that a purchased spore syringe doesn’t also contain competing spores that were attached to the mushroom or bacteria that arrived from an unknown source. If a contaminated syringe is used to inoculate grain or any other material, the end result will likely be a green mould farm. In other words, not good.
Also, inoculating spawn material with spores is slower than starting with liquid culture which already contains live mycelium. Aside from being time consuming, the longer it takes to fully colonise your spawn material the higher the risk of contamination setting in naturally.
Why use spore syringes at all?
Despite possible drawbacks, spore syringes (or spore prints) are very useful, but instead of using them to inoculate spawn material, spore syringes and spore prints can be used to inoculate agar in petri dishes, which will then transform into live mycelium. If contamination appears on the agar, healthy parts of the mycelium can still be transferred to fresh agar to continue growth in a selective fashion. One syringe can be used to inoculate dozens of agar petri dishes. If no contamination arises, the mycelium can then be used either to inoculate spawn material or be added to a nutrient liquid to create liquid culture. This is the way many regular growers use spores.
Creating spore prints
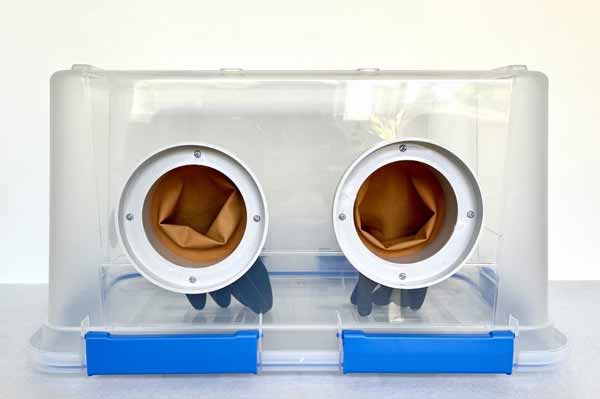
A quality still air box
Before you can create a spore syringe you need a spore print. You can buy them, but you can also make spore prints yourself. The process is relatively simple, even if care is needed to ensure the most sterile working conditions possible. Ideally you will use a laminar flow hood or, if not, a still air box (instructions for making one of these from a simple plastic tote box can be found all over the internet). Failing that, a room which can be closed and left unoccupied for an hour or more to allow air to settle prior to starting work.
Method 1
You need a live, freshly picked mushroom, a sheet of tin foil (good quality kitchen foil, the thicker the better) and a plastic tub with an airtight lid, something like the medium-size containers takeaway food shops use.
Take the lid of the takeaway container and lay it on its back (so it is upside down). Cut a piece of tin foil so that it is slightly smaller than the lid and place it on top. Then take your mushroom and quickly snip or pull off the stem. If you use a cutting blade, ensure it is flame sterilised first (red hot) and has cooled to room temperature before using it. Quickly place the mushroom cap on the foil, gills facing down, and at one end, not in the middle (later in the process you need to fold the other half of the foil over the top of the spore print). Now place the takeaway container on top of the lid (still upside down, so as to form a sealed box). Leave the container somewhere shaded for 24-36 hours to allow the spores to fall from the cap.
After waiting at least 24 hours, carefully open the container, avoiding shaking or dislodging the mushroom. Remove the mushroom cap – picking it up with a blade may be easiest, but in any case do not touch the foil or print with your fingers. What you will see depends on the species of mushroom – some drop lots of spores, some very few, and some are very dark while others are not. Some mushrooms are notoriously difficult to spore print and may not drop any spores at all. If you can’t see a definite ‘print’ of your mushroom, it probably hasn’t dropped any spores. Try with another…
At this stage you could optionally add a small dessicant (must be food grade) sachet at the other end of the container to speed up drying, but that’s your choice. Now close the lid again and return the container to a shaded place to allow the print to dry out. This will usually take a day or two. The spore print needs to be very dry otherwise you won’t be able to scrape spores off the foil. A day or two later you have a dried spore print.
When the print is 100% dried out, open the container and fold the clean half of foil flat over the top of the print – but don’t press it down. Put this into an airtight sealable bag, optionally with a dessicant sachet, and keep it somewhere dark, cool and dry.
Creating spore syringes
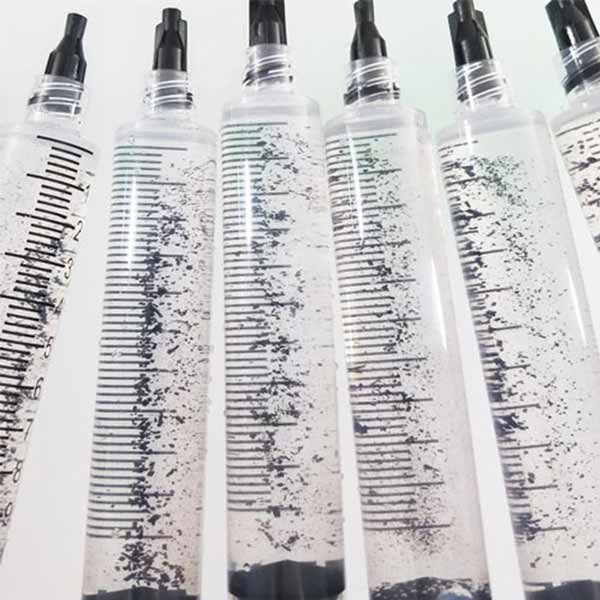
Spore syringes
Assuming you have a nicely dried spore print, you can now create a spore syringe. Again you need to work with a flow hood, still air box or at least in a room with still air. You need a jar of sterilised water – if you aren’t able to properly sterilise the water with a pressure cooker (at 15psi) we suggest boiling distilled water (as a last resort filtered tap water if you have no choice) in a saucepan with a good lid for several minutes. Keep the lid on the saucepan at all times and allow it to fully cool down.
You want something like a small shot glass which can hold at least a syringe full of water. If you are unable to sterilise equipment but have a microwave, clean the microwave carefully, clean the glass thoroughly and then 1/4 to 1/3 fill with distilled water and microwave it in short 2 minute bursts until the water boils and creates steam. The steam sterilises. Remove the glass from the microwave using tongs or heat-proof gloves, quickly empty it then place it upside down on a clean paper tissue, and wait until it is cold again before using it. Keep it covered until the very last moment to avoid it coming into contact with airborne contaminants.
In your working space, flame sterilise a scalpel or similar blade and allow it to fully cool down. When all is ready, pour a syringe-worth of water into the glass. Next, open the spore print up and carefully scrape the print to dislodge the spores. Hold the foil over the shot glass and tap it to get the spores to fall into the water. Open your sealed syringe and attach a needle (without touching the needle itself). Use the syringe to suck up some of the water, then blow it back into the glass so as to stir the water and ensure spores are mixed well, then suck the mix into the syringe. Either put the sterile cap back on the needle or remove it and close the syrine with a sterile stopper. You now have a spore syringe. Place it in an airtight bag and store it in your fridge until you are ready to use it.
That’s it.